Setting up printers correctly in your FeedMe POS system is essential for smooth restaurant operations. By assigning printers to specific areas such as, kitchen, bar, drinks, you can avoid confusion, reduce human error, and deliver faster service.
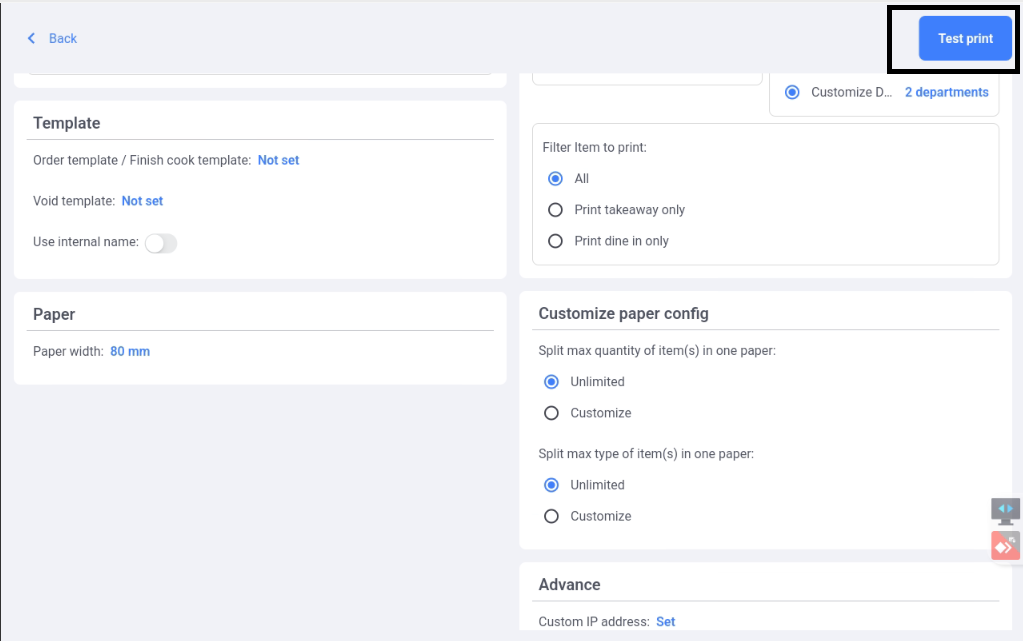
This step-by-step tutorial will guide you through how to set up and configure printers in FeedMe, including how to add a backup printer.
🔹 Step 1: Open Printer Settings in FeedMe
1. Open your FeedMe POS app.
2. Tap on the Settings menu.
3. Navigate to Printer Setup.
This is where you will manage all your printers.
🔹 Step 2: Add a New Printer
1. Tap on “Add New Printer”.
2. Assign a clear name for your printer (e.g., Kitchen Printer, Bar Printer, Drinks Printer).
3. Choose your connection type:
Bluetooth – for wireless short-range printing
Network – for WiFi or Ethernet-connected printers
USB – if your device supports USB printing
3. FeedMe will automatically scan for available printers nearby.
4. Select your printer from the list.
✅ Tip: Use labels or stickers on physical printers to match the names in FeedMe.
*Sunmi V3 Mix is used to demonstrate FeedMe above, it has an inner printer, so from above is set as bluetooth > inner printer.
🔹 Step 3: Setting Up Drink Printer
1. Under “Config”, choose what to print for the printer in drink area. (in the demo assume this printer can print while customer change table, order voided, order received).
2. Under “Select Table to print”, you can choose “All” to allow this printer to print drink order from any table, or you can choose “Customize” to allow this printer to print drink order from specific table.
3. Under “Select Item to print”, choose which items or department this printer will handle:
🍽️ Item-Based Example:
Kitchen Printer → prints only:
Steam Chicken Rice
Roti Canai
Drink Printer → prints only:
100Plus
Sprite
🧾 Department-Based Example:
Kitchen Printer → handles:
Mains
Sides
Drink Printer → handles:
Beverages
Alcohol
🔹 Step 4: Customize paper config of the printer
1. Under paper config, you can customize print options:
Split max quantity of item(s) in one paper:
1. Unlimited – All items in one order paper.
2. Customize – Set a max number of items in one order paper.
Split max type of item(s) in one paper:
1. Unlimited – All items type in one order paper.
2. Customize – Set a max number of item types in one order paper.
🔹 Step 5: Run a Test Print
Test your printer setup:
1. From Printer Setup, tap “Test Print” next to each printer.
2. Confirm:
The correct printer responds
The printed order shows the right items/ departments.
✅ If anything is incorrect, revisit the settings and adjust item rules or printer assignments.
🎥 Want to See It in Action?
Watch our full video guide on YouTube:
👉 FeedMe Printer Setup Video
📞 Need Help Setting It Up?
Our team is here to support you.
Whether you’re opening your first café or scaling to multiple locations, we’ll help you get the perfect printer setup for your kitchen, bar, and drinks station.
📩 Contact us today for:
Personalized setup assistance
A free demo of FeedMe POS
Answers to any questions

Add a Comment